
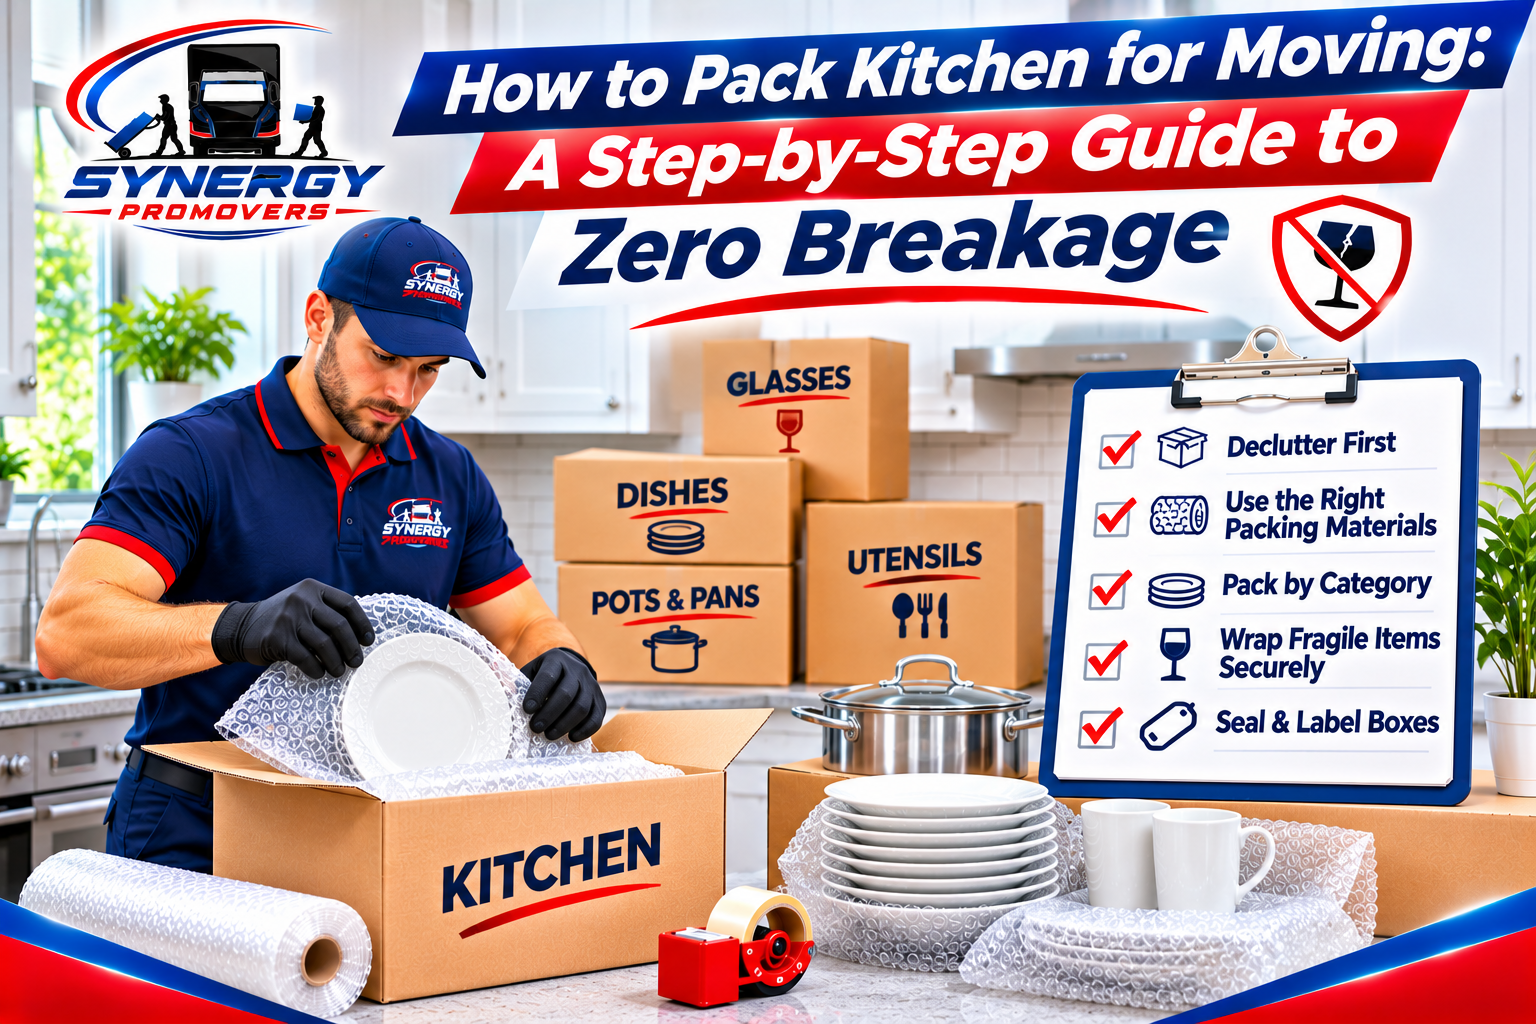
The kitchen is consistently the most time-consuming room to prepare for a move because it combines fragile ceramic and glass surfaces, dense cast-iron and steel cookware, sharp cutlery, perishable food, and sensitive electrical appliances in a single space. Packing a standard family kitchen safely requires 10 to 15 hours of focused work spread across 5 to 7 days, using heavy-duty double-walled dish barrels for breakables, small 1.5-cubic-foot boxes for heavy pantry items, and a strict 18 to 23 kg (40 to 50 lb) maximum weight limit per carton. By wrapping plates and glassware individually, loading dishes vertically on their edges rather than flat in stacks, and setting aside a 48-hour essentials box, you can transport your entire kitchen across town or across provinces without cracked ceramics or crushed boxes.
Key Takeaways
- Load plates vertically on their edges, never flat: Ceramic and porcelain plates withstand road vibrations far better when standing on edge inside a cushioned dish barrel than when stacked flat under downward weight.
- Keep every packed kitchen box at or below 18 to 23 kg (40 to 50 lb): Use small 1.5-cubic-foot boxes for canned goods, cast iron, and cookbooks, and reserve tall 4.5-cubic-foot double-walled dish packs for cushioned breakables.
- Build a 5 to 8 cm (2 to 3 inch) shock-absorbing base and top layer: Line the bottom and top of every fragile carton with crumpled unprinted newsprint or cellular cushioning paper to absorb vertical shock on the moving truck.
- Defrost and drain water-line appliances 24 to 48 hours early: Refrigerators, freezers, and espresso machines retain internal moisture that can leak onto cardboard boxes or freeze and crack internal tubing during Canadian winter moves.
- Separate hazardous under-sink cleaners from moving cartons: Pressurized aerosols, bleach, and flammable solvents cannot legally or safely ride inside an enclosed moving truck and should be disposed of or transported separately.
What Is the Best Way to Pack Kitchen for Relocation?
The best way to pack kitchen for relocation is to work in three distinct phases—decluttering pantry and under-sink inventory first, packing rarely used cookware and specialty appliances 4 to 5 days before moving day, and sealing daily dishes and an “Open-First” essentials box in the final 24 hours. Starting with a structured sorting system prevents the common mistake of mixing heavy cast-iron skillets with delicate stemware in the same oversized box during a last-minute rush.
When homeowners ask our crews about how to pack kitchen for moving, the biggest point of failure is rarely a lack of bubble wrap—it is improper box selection and weight distribution. Standard single-wall cardboard boxes (rated at 32 ECT, or Edge Crush Test) frequently buckle when stacked three or four high inside a moving truck if they are overloaded with stoneware and canned food. Professional packers rely on double-walled dish barrels (rated at 48 ECT) for fragile items and enforce a strict rule: the heavier the item, the smaller the box.
Before taping your first carton, gather the right materials so you do not have to improvise with thin grocery bags or bath towels that slip off smooth ceramic surfaces:
| Kitchen Item Category | Recommended Box Type & Size | Cushioning & Wrapping Material | Max Safe Box Weight |
|---|---|---|---|
| Everyday Plates, Bowls & Serving Platters | 4.5 cu. ft. Double-Walled Dish Barrel (45 × 45 × 60 cm) | Unprinted white newsprint + corrugated cardboard dividers | 18 to 23 kg (40 to 50 lb) |
| Wine Glasses, Stemware & Crystal | Dish Barrel or Divided Cell Box (45 × 45 × 60 cm) | Cardboard cell grid inserts + tissue or soft newsprint | 14 to 18 kg (30 to 40 lb) |
| Cast Iron, Dutch Ovens & Heavy Pots | 1.5 cu. ft. Small Book Box (40 × 30 × 30 cm) | Kraft paper + bubble wrap for glass lids | 18 to 23 kg (40 to 50 lb) |
| Countertop Appliances (Stand Mixer, Air Fryer) | Original Factory Box or 3.0 cu. ft. Medium Box (45 × 45 × 40 cm) | Small-cell bubble wrap + crumpled newsprint void fill | 18 to 20 kg (40 to 45 lb) |
| Canned Goods, Dry Pantry Jars & Spices | 1.5 cu. ft. Small Book Box (40 × 30 × 30 cm) | Resealable freezer bags (for open liquids) + newsprint | 18 to 23 kg (40 to 50 lb) |
Essential Kitchen Packing Tips for Moving Without Breakage
Following proven kitchen packing tips for moving reduces unpacking time and eliminates internal impact damage when a moving truck traverses speed bumps, highway expansion joints, or steep loading ramps. The goal inside every carton is zero internal movement: when you press down on the closed flaps of a packed box, the top should feel firm without bowing inward or rattling when gently tilted.
- Tape the bottom seam using the H-taping method: Apply two strips of 48 mm acrylic or hot-melt packing tape along the center seam where the bottom flaps meet, then seal both perpendicular outer edges to form an “H.” Never rely on folded interlocking box flaps without tape—a single stack of dinner plates will push straight through an untaped bottom.
- Always build a 5 to 8 cm (2 to 3 inch) crumple zone: Before placing a single plate or glass inside a box, crumple several sheets of unprinted newsprint into loose balls and line the bottom floor of the carton 5 to 8 cm (2 to 3 inches) deep. Repeat this exact cushioning layer at the very top of the box before sealing the flaps.
- Use unprinted newsprint instead of newspaper: Standard newspaper ink rubs off onto unglazed porcelain bottoms, textured stoneware, and plastic appliance housings, forcing you to wash every dish in your new home before putting it in the cupboard.
- Pack heaviest items on the bottom, lightest on top: Within a dish barrel, place heavy ceramic mixing bowls, stoneware casserole dishes, and Dutch ovens in the bottom third of the box, medium dinner plates and salad bowls in the middle third, and lightweight coffee mugs or drinking glasses in the upper third (separated by flat cardboard layer pads).
- Label two adjacent sides plus the top flap: When boxes are stacked inside a truck or staged in a high-rise condo hallway in Toronto, Ottawa, or Montreal, top labels are invisible. Mark the contents, room destination (
KITCHEN — FRAGILE), and directional arrows (THIS SIDE UP) on two neighbouring vertical sides.
How to Pack Kitchen Items Step by Step by Category
Understanding how to pack kitchen items by material type ensures that dense metal cookware, brittle tempered glass, and sharp carbon-steel blades never come into direct contact inside a carton. Below is the exact method used by professional residential packers for each category in your cupboards.
Packing Dishes for Moving Using the Vertical Edge Method
When packing dishes for moving, the single most important rule is to load plates vertically on their edges like vinyl records, never stacked flat one on top of another. A ceramic plate is engineered to support minor weight across its face, but when eight or ten plates are stacked flat in a box and the moving truck hits a pothole on Highway 401 or Highway 417, the downward g-force concentrates on the bottom two plates and snaps them in half. Standing plates on edge transfers that force along the structural rim of the ceramic.
- Step 1: Place a stack of 50 to 100 sheets of unprinted newsprint flat on your dining table or kitchen island.
- Step 2: Set one dinner plate in the center of the top sheet, pull two opposite corners of the paper tightly over the plate face, and tuck them underneath. Place a second plate on top of the wrapped first plate, grab the next two sheets of paper together, and wrap both plates into a unified two-plate bundle (up to three plates per bundle for smaller salad plates).
- Step 3: Seal the bundle snug with a strip of painter’s tape or packing tape so the paper cannot unfurl.
- Step 4: Stand each wrapped bundle on its edge atop the 5 to 8 cm (2 to 3 inch) crumpled paper base inside your dish barrel. Pack the row tightly from left to right, wedging crumpled paper into any corner gaps so the row cannot tip sideways.
- Step 5: Lay a flat sheet of corrugated cardboard over the completed row of plates before starting a second tier of lighter bowls or mugs above it.
How to Pack Glassware Safely: Stemware, Mugs, and Barware
Knowing how to pack glassware safely comes down to relieving internal tension inside the glass bowl and protecting delicate stems from lateral torque. Never nest unwrapped drinking glasses inside one another; temperature changes and road vibrations cause nested glass walls to bind and shatter.
- Stuff the interior cavity first: Gently crumple a half-sheet of soft paper or tissue and push it inside the mouth of the glass or goblet. Supporting the interior cavity prevents the rim from crushing inward under external pressure.
- Reinforce wine glass stems: For stemmed wine glasses and champagne flutes, roll a narrow strip of paper or small-cell bubble wrap around the stem first until it matches the thickness of the base, eliminating the weak point where the stem meets the bowl.
- Roll from the corner and tuck into the mouth: Lay the glass diagonally near one corner of a double sheet of newsprint. Roll the glass toward the opposite corner while folding the excess side paper into the opening and over the base.
- Load glasses rim-down inside the top tier or cell divider: Place wrapped glasses vertically (rim facing down, base facing up) inside cardboard cell dividers or as the top layer of a dish barrel. Never lay glasses horizontally on their sides.
How to Pack Pots and Pans, Cast Iron, and Glass Lids
Learning how to pack pots and pans properly protects both non-stick ceramic or PTFE coatings from metal-on-metal scratching and tempered glass lids from shattering against heavy pot handles.
- Nest metal pots with two sheets of paper between each layer: Place your largest stockpot or saucepan upright in a small or medium box, line its interior with two sheets of heavy kraft paper or newsprint, and nest the next smaller pan inside (up to three pans deep).
- Never pack glass lids attached to their pots: Remove every tempered glass lid, wrap it individually in bubble wrap and newsprint, and stand the wrapped lids vertically on edge along the side wall of the box, separated from metal handles by a cardboard divider.
- Isolate cast iron in small 1.5-cubic-foot boxes: A single 30 cm cast-iron skillet or enamelled Dutch oven can weigh 4 to 7 kg (9 to 15 lb). Pack no more than two or three cast-iron pieces per small book box, padding the protruding handles with thick cardboard sleeves so they cannot puncture the side of the carton.
Wrapping Kitchen Knives, Cleavers, and Sharp Utensils
Unprotected kitchen knives are a serious safety hazard for anyone unpacking boxes on the other end of a move. Never drop loose paring knives, chef’s knives, or food-processor blades into a utensil carton.
- Slide each blade into a cardboard sleeve: Fold a piece of thick corrugated cardboard (cut from a spare box flap) over the sharp edge and tip of the blade, then wrap tape around the cardboard sleeve—not directly onto the steel blade—so the knife cannot slide out forward.
- Roll sleeved knives into a bundle: Lay three to four sleeved knives parallel on a double sheet of newsprint or a thick kitchen towel, roll them into a cylinder, fold the ends inward so no tips can escape, and tape the roll shut. Label the outside of the paper bundle clearly in bold marker:
SHARP KNIVES — UNWRAP CAREFULLY.
Packing Kitchen Appliances: Countertop Units vs. Major Appliances
Successful packing kitchen appliances requires separating heavy motorized bases from removable glass carafes, ceramic slow-cooker inserts, and sharp blender blades.
- Small countertop appliances (espresso machines, blenders, air fryers, stand mixers): Unplug the unit, allow it to cool completely, and wash and dry all removable baskets, carafes, and drip trays. Secure the power cord to the side of the housing with a twist tie or painter’s tape. Remove glass blender jars, coffee pots, and ceramic slow-cooker crocks, wrap them separately in bubble wrap, and place them beside—not attached to—the motor base inside a medium box or the original factory box.
- Winter freeze alert for Canadian relocations: If you are moving between November and April across Ontario or Quebec (for example, between Ottawa, Gatineau, Kingston, Belleville, Toronto, or Montreal), espresso machines, Keurig brewers, and water filtration pitchers must have their internal boilers and reservoirs purged of water. Residual water left inside an unheated moving truck overnight at sub-zero temperatures expands as it freezes and cracks internal brass or plastic pump lines.
- Major appliances (refrigerators, freezers, dishwashers, stoves): Disconnect water lines and defrost your refrigerator and freezer 24 to 48 hours before moving day so all ice melts and the interior walls can be wiped dry with baking soda and water to prevent mildew. Remove loose glass refrigerator shelves and crisper drawers, wrap them in moving blankets or bubble wrap, and tape the appliance doors shut only after the interior is completely dry.
How to Pack Kitchen for Moving When Dealing with Perishables and Hazardous Liquids
Planning how to pack kitchen for moving also means knowing what should never go inside a cardboard box on a moving van. Both food safety standards and Canadian transportation regulations restrict certain items found in every pantry and under every kitchen sink.
Managing Refrigerated and Perishable Food
According to Health Canada’s safe food storage guidelines, perishable foods such as meat, poultry, fish, dairy products, and cut produce must be kept at or below 4 °C (40 °F) to prevent rapid bacterial growth, and should be discarded if left in the temperature danger zone (4 °C to 60 °C) for more than 2 hours.
- For local moves (under 2 hours of transit): Transport your remaining refrigerated and frozen food in your personal vehicle inside hard-sided insulated coolers packed with ice packs, and load the cooler last so it goes straight into your new refrigerator upon arrival.
- For long-distance moves (overnight or multi-day transit): Do not pack any refrigerated, frozen, or fresh produce onto a moving truck. Consume perishables during the two weeks leading up to moving day, and donate unopened non-perishable canned or boxed food to a local food bank to reduce your shipment weight.
- Opened dry goods and liquid bottles (olive oil, vinegar, soy sauce, syrup): Even tightly screwed bottle caps can leak when air pressure or temperature fluctuates inside a truck trailer. Seal the cap of any kept bottle with painter’s tape, place the bottle upright inside a heavy-duty resealable plastic freezer bag, and pack it upright in a small plastic tote rather than alongside dry cardboard boxes.
Hazardous Under-Sink Cleaners and Pressurized Cans
Under Transport Canada’s Transportation of Dangerous Goods regulations and standard carrier tariffs outlined by the Canadian Association of Movers (CAM), moving companies are prohibited from transporting hazardous, flammable, corrosive, or explosive household items inside enclosed moving vans. Remove and dispose of (or transport safely in your own car where legal) the following kitchen items before your movers arrive:
- Aerosol cooking sprays, pressurized whipped-cream chargers, and aerosol oven cleaners
- Liquid bleach, ammonia, drain openers, and corrosive limescale removers
- Butane culinary torches, camping stove fuel canisters, and patio barbecue propane tanks
- Fire extinguishers and strike-anywhere matches
7-Day Kitchen Packing Checklist and Timeline
Using a structured kitchen packing checklist breaks a daunting 12-hour job into manageable 90-minute evening sessions so you are still able to cook simple meals until the day before your move.
- 7 Days Out — Purge & Measure: Empty the pantry, spice rack, and freezer of expired food and half-empty bottles. Measure your largest kitchen island or dining table if moving into a high-rise condo in Toronto, Ottawa, or Montreal to confirm freight elevator cab clearance.
- 5 to 6 Days Out — Pack Rarely Used Items: Pack fine china, crystal stemware, holiday serving platters, cake stands, cookbooks, and specialty appliances (waffle irons, fondue sets, bread makers, ice cream makers).
- 3 to 4 Days Out — Pack Secondary Cookware & Bakeware: Pack baking sheets, muffin tins, casserole dishes, mixing bowls, extra food storage containers, and all pots and pans except one everyday skillet and one saucepan.
- 2 Days Out — Pack Primary Dishes, Glassware & Dry Pantry: Pack all remaining dinner plates, salad bowls, wine glasses, mugs, and unopened dry pantry goods into small boxes and dish barrels. Switch your household to paper plates or a single set of washable camp dishes for the final 48 hours.
- 24 to 48 Hours Out — Defrost Major Appliances: Unplug, defrost, drain, and wipe down your refrigerator, freezer, dishwasher filter, and espresso machine boiler so zero standing water remains.
- Moving Eve — Pack the “Open-First” Essentials Box: Pack your last skillet, coffee maker, dish soap, sponge, paper towels, garbage bags, box cutter, phone chargers, and one plate/cutlery set per family member into a clearly marked clear plastic bin or top-load box labeled
KITCHEN ESSENTIALS — LOAD LAST, UNLOAD FIRST.
High-Rise Condo vs. House Moves: Staging Your Packed Kitchen Boxes
If you are relocating out of or into a high-rise condominium in Downtown Toronto, Centretown Ottawa, or Montreal, how you stage your packed kitchen cartons directly affects whether your crew finishes inside your building’s strict 2.5-to-3-hour service elevator booking window.
- Keep box sizes uniform for 4-wheel dolly stacking: Movers load high-rise elevators fastest when boxes share a uniform footprint (standard 1.5 cu. ft. small boxes, 3.0 cu. ft. medium boxes, and 4.5 cu. ft. dish barrels) so four to five cartons can be stacked securely onto a single vertical hand truck or bin cart. Oddly shaped liquor-store boxes with open tops slow down elevator loading because they cannot be stacked.
- Stage packed kitchen boxes in the living room, not inside the narrow galley kitchen: High-rise condo kitchens rarely have enough floor width for two movers to maneuver dollies around an island. Stack your sealed, weight-checked kitchen boxes against a clear wall near the front foyer 3 to 4 boxes high (heavy small boxes on the bottom, fragile dish barrels set separately in a single layer).
- Keep pathways to the appliances clear: If your move includes transporting major appliances or heavy kitchen islands, remove everything from the tops of the refrigerator and counters the night before so the crew can pad-wrap and dolly heavy pieces immediately while they have exclusive lock-off access to the freight elevator.
DIY Kitchen Packing vs. Hiring Professional Packers: When Does Full-Service Make Sense?
Most homeowners can comfortably pack their own dry pantry, Tupperware drawers, and metal pots and pans over a weekend. However, bringing in professional packers for the kitchen alone—often called a partial or fragile-only pack—is frequently the most cost-effective upgrade in a residential relocation when:
- You have a large collection of heirloom porcelain, bone china, crystal stemware, or heavy stoneware and less than 48 hours available before moving day.
- You are coordinating a long-distance move along the Highway 401 / 417 corridor (between Ottawa, Kingston, Belleville, Toronto, Gatineau, or Montreal) where boxes will experience 3 to 6 hours of continuous highway vibration.
- You are balancing full-time work or childcare and want a trained two-person packing crew to wrap, cushion, and box your entire kitchen in 3 to 4 hours using commercial-grade double-walled dish barrels.
At Synergy Pro Movers, our crews offer both full-home and kitchen-only professional packing services, supplying heavy-duty dish barrels, unprinted newsprint, and bubble wrap as part of a streamlined preparation plan. Whether you are booking a local residential moving crew for a neighbourhood move or coordinating long-distance moving services across Ontario and Quebec, you can request a moving and packing estimate tailored to your exact inventory and timeline.
Frequently Asked Questions
What is the fastest schedule for how to pack kitchen for moving?
The fastest safe schedule is a 3-stage pack completed over 3 to 5 days: pack rarely used bakeware, specialty appliances, and extra glassware first; pack 80% of your everyday plates, pots, and pantry staples 48 hours before moving day; and pack your final 48-hour essentials box the night before the truck arrives. A two-person professional team can complete a standard kitchen in 3 to 4 hours.
How many boxes does it take to pack an average kitchen?
A typical 2-to-3-bedroom household kitchen requires 15 to 25 boxes in total: approximately 4 to 6 double-walled dish barrels (4.5 cubic feet) for plates, bowls, glassware, and fragile items; 6 to 10 small boxes (1.5 cubic feet) for canned food, spices, utensils, and heavy cookware; and 5 to 8 medium boxes (3.0 cubic feet) for pots, pans, Tupperware, and small countertop appliances.
Should plates be packed flat or vertically on their edges?
Always pack plates vertically on their edges inside a cushioned dish barrel, never flat in horizontal stacks. Plates standing on edge distribute vertical road shock along the strongest part of the ceramic rim, whereas flat-stacked plates transfer the entire combined weight of the stack onto the bottom plates, causing hairline fractures or breakage when the truck hits bumps.
Can I use kitchen towels and linens instead of packing paper to wrap dishes?
You can use clean dish towels, oven mitts, and tablecloths to fill empty corner gaps or cushion metal pots and baking sheets, but you should not rely on towels alone to wrap slick ceramic plates or glass stemware. Fabric slips off smooth glazed surfaces during transit; wrap fragile dishes in unprinted newsprint first, then use kitchen linens as outer padding.
How do I pack spices, cooking oils, and open pantry items without spills?
Discard expired spices and nearly empty condiment bottles first. For unopened bottles and jars you plan to keep, tape the lids shut with painter’s tape, seal liquid bottles (like olive oil, honey, and vinegar) upright inside heavy-duty resealable freezer bags, wrap glass jars in newsprint, and pack them upright inside a small 1.5-cubic-foot box or rigid plastic bin.
How far in advance should I unplug and defrost my refrigerator before moving?
Unplug and empty your refrigerator and freezer 24 to 48 hours before moving day. This gives built-up frost inside the freezer coils and internal drip pans enough time to melt completely. Wipe all interior surfaces dry and leave the doors propped open until moving morning to prevent mould, odours, and water leaks inside the moving truck.
Can movers transport my propane barbecue tank or under-sink cleaning chemicals?
No. Canadian transportation safety rules prohibit moving companies from carrying flammable, corrosive, or pressurized items—including propane cylinders, butane torches, aerosol sprays, bleach, and ammonia cleaners—inside an enclosed moving van. Empty and purge propane tanks or transport permitted household items safely in your personal vehicle.